Making your own SynthEdit module with the free Code::Blocks environment.
Download and install the latest compiler (MinGW) from www.mingw.org During install you need to manually select c++ as an optional component.
Download and install the Development Environment from www.codeblocks.org Get the Binary release for Windows without the compiler included. (The included compiler is dated).
Download the SynthEdit Software Development Kit (SDK) and extract it. I put it in C:\SynthEditSDK.
Note: This compiler does not support spaces in folder names. Don't use any folder name with spaces. e.g. "C:\My Modules\"
You can now make your own module.
Browse to C:\SynthEditSDK, This folder contains the code for many of SynthEdit's modules plus the SDK itself (in se_sdk3). These modules are a good starting point for making your own. Don't modify them directly. Make a copy. Select the Gain folder, right-click Copy, then Paste to make a copy. Rename new folder 'MyGain'.
Start Code::Blocks. This Development Environment is a easy compiler front-end. We are going to create a new module project from scratch.
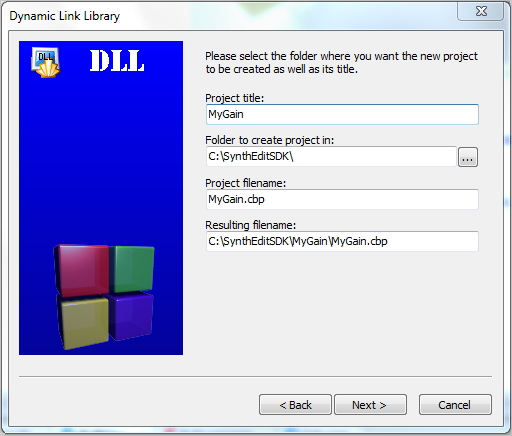
Choose 'Create a new project' (this starts a wizard), choose 'Build Targets' - 'Dynamic Link Library'. On the next page type the module name 'MyGain', folder 'C:\SynthEditSDK'. Click 'Next' through to 'Finish'.
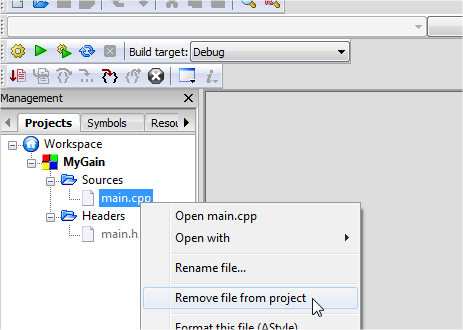
On the left pane are the project files. These are defaults created by the wizard. We don't need them. Expand the folders and use right-click 'Remove from Project' to remove 'main.h' and 'main.cpp'.
First add the SDK files (these are common to any SEM modules). Menu 'Project/Add files', from the 'C:\SynthEditSDK\se_sdk3' folder add 'mp_sdk_common.h', 'mp_sdk_common.cpp', 'mp_sdk_audio.h', 'mp_sdk_audio.cpp'.
In the dialog box 'Select the targets this file should belong to', both boxes should be ticked, choose 'OK'.
Now add your custom module files, this is the code specific to your module. From the 'C:\SynthEditSDK\MyGain' folder add 'Gain.h', 'Gain.cpp', 'Gain.rc', 'Gain.xml', and 'resource.h'.
You should now see the files in the left-hand pane. You can double-click any to open them.
Before we can compile our module for the first time there are a few setting to fix.
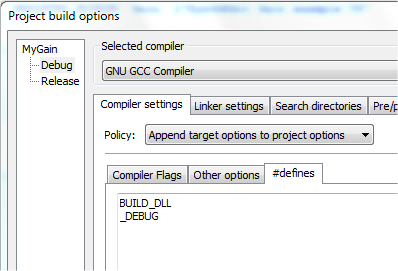
Menu Project/Build Options/Compiler Settings/#defines - Select 'Debug' target top left. Add '_DEBUG' (without the quotes).
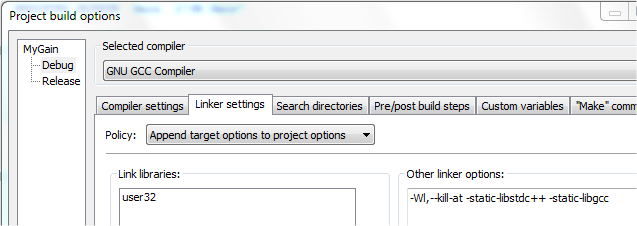
Menu Project/Build Options/Linker Settings/Other Linker Options
- Add:
-Wl,--kill-at -static-libstdc++ -static-libgcc
Close the Project Build Options.
Open Project Properties (Menu Project Properties/Build Targets) - Untick 'Auto generate filename extension'. Change Output filename extension to 'bin\Debug\MyGain.sem'.
Click Build Target 'Release' and repeat previous 2 steps to change the filename. Click 'OK' to close Project Build Options..
Now we can compile the module. Choose menu 'Build/Build'.
With luck the build log windows should show your files being compiled with '0 errors'.

If you browse to 'C:\SynthEditSDK\MyGain\bin\Debug' you should see your fresh new SEM!
This SEM needs to go in your SynthEdit modules folder. We can automate that:
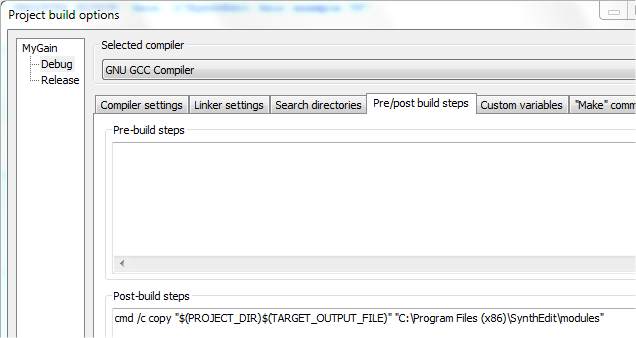
Menu 'Project/Build options/pre-post build steps' Add the following...
cmd /c copy "$(PROJECT_DIR)$(TARGET_OUTPUT_FILE)" "C:\Program Files (x86)\SynthEdit\modules"
Choose menu 'Build/Rebuild', check that the log window shows '1 file(s) copied.' else check the above command. Note Windows 32-bit uses 'Program Files' not 'Program Files (x86)'.
If you start SynthEdit now you should get confirmation of your new module via a 'Module found twice!' message. This is because so far you have only duplicated the existing Gain module. Close SynthEdit.
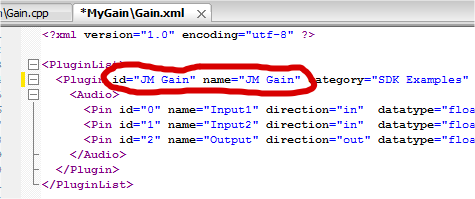
Back in Code::Block you can now start modifying the module to make it your own. In the left-hand pane find 'Gain.xml', open it in the CodeBlocks editor. This file identifies the name of the module and what plugs it has. Look for the Plugin id ''SynthEdit Gain example V3'. Change it to e.g. 'JM Gain' (JM is my initials, use yours). Change the 'name' to 'JM Gain' to differentiate it from the SynthEdit Gain module.
Open 'Gain.cpp'. Near the top find this line..
REGISTER_PLUGIN( Gain, L"SynthEdit Gain example V3" );
Change that id to the exact same one in the XML file, e.g.
REGISTER_PLUGIN( Gain, L"JM Gain" );
This line links the c++ class to the XML code.
Build the project again and open SynthEdit. You should see your module available on the 'Insert/SDK Examples/My Gain' menu."
Check the module's information. Right-click Debug/About. You should see your module ID, SDK version and compiler version (GCC).
You should now be able to create your own basic audio modules using the Code::Blocks IDE. Any questions to the SE SDK mailing list please.